
Dealing with a faulty garage door spring can be daunting. Whether it's wear and tear or just the end of its lifecycle, those springs play a crucial role in your garage door's operation. You're likely facing a door that won't open, or worse, one that's unsafe to operate. But don't worry, you're not alone in this. Understanding the basics of garage door spring repair can save you time and ensure your door is back to functioning smoothly.
Repairing a garage door spring isn't for the faint of heart. It requires precision, the right tools, and an understanding of the risks involved. While DIY repairs might tempt you, it's essential to know when to call in the professionals. This guide is here to walk you through the signs of spring failure, the importance of professional intervention, and how to maintain your springs to prevent future breakdowns. Let's dive in and get your garage door running like new.
Understanding the Garage Door Spring
The pivotal role of garage door springs in the functionality and safety of your garage door cannot be overstated. These components are under constant tension, working tirelessly to balance and manage the heavy weight of the garage door. Understanding the basics of garage door springs, including the types available and the signs that indicate a problem, is essential for maintaining the longevity and safety of your garage door system.
Types of Garage Door Springs
Garage door systems utilize two main types of springs: torsion springs and extension springs. Each type has its specific placement and function in the mechanism of opening and closing your garage door.
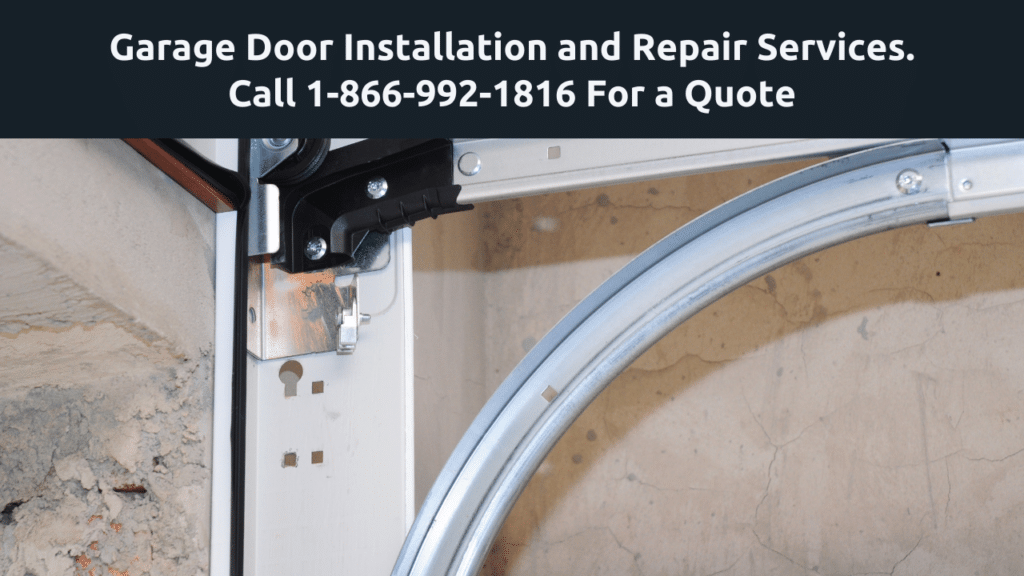
- Torsion Springs: Located directly above the garage door opening, torsion springs wind and unwind in a controlled motion to facilitate the lifting and lowering of the door. They are known for their efficiency and durability. Torsion springs are often considered safer and more stable than their counterparts, especially for heavier doors.
| Type | Location | Suitability |
|---|---|---|
| Standard Torsion Springs | Above the door opening | Lighter garage doors |
| Torque Master Torsion Springs | Hidden in a tube above the door | Enhancing safety |
- Extension Springs: These are found on either side of the door, extending and contracting as the door moves. Extension springs are utilized in pairs and are known for providing the balance and support needed during the door's operation. However, they can be more dangerous due to the potential for snapping and should be handled with care.
| Spring Type | Location | Function |
|---|---|---|
| Extension Springs | Side of the door | Balance and support |
Signs of a Broken Garage Door Spring
Recognizing the signs of a failing garage door spring early can prevent potential injury and property damage. Here are the critical indicators that your garage door spring may need attention:
- The Door Won't Open or Close: If your garage door refuses to move, a broken spring could be the culprit.
- Heavy Door: A door that suddenly feels heavier when lifted manually might indicate that the springs are no longer doing their job.
- Loud Noises: Hearing a loud bang or popping sound from the garage might mean a spring has snapped.
- Uneven Movement: If the door opens or closes unevenly or halts partway, the balance may be off due to a faulty spring.
- Visible Damage: In some cases, you might be able to see the damage to the spring, such as a gap in a torsion spring or an extension spring that has stretched out.
Preparing for the Repair
Gathering the Necessary Tools and Equipment
Before diving into the intricacies of garage door spring repair, it's critical to assemble all the necessary tools and equipment. This preparatory step is indispensable, as it primes you for a smoother, more efficient repair process. You'll need:
- Winding bars: Essential for adjusting torsion springs.
- Locking pliers or C-clamp x 2: These tools secure the garage door in place.
- Ladder: For reaching the garage door mechanism.
- Eye protection: Safety glasses shield your eyes from potential hazards.
- Leather gloves: Protect your hands from sharp edges and springs.
- Wrench: Used for loosening and tightening nuts and bolts.
- Measuring tape: For measuring the springs.
- New springs: It's crucial to have the correct replacement springs ready.
- Hammer: Aids in removing and installing components.
- Cardboard or paper bag: For safely disposing of the old springs.
- Garage door lubricant: Keeps the system operating smoothly.
Having these tools and materials at your disposal ensures that you're well-equipped to tackle the repair head-on, minimizing unforeseen obstacles that could arise due to a lack of preparation.
Ensuring Safety Measures
Garage door spring repair carries inherent risks, making safety measures non-negotiable. Eye protection and leather gloves are your first line of defense against accidents. Beyond personal protective equipment, securing the garage door to prevent unintended movement is crucial. Using locking pliers or a C-clamp on the track keeps the door stationary during the repair.
Understanding the potential dangers associated with torsion springs is also vital. These springs are under a significant amount of tension and can cause injury if not handled correctly. Prior to starting, double-check that the garage door opener is unplugged to avoid accidental activation of the door. If your car is parked inside the garage, it's wise to move it out if possible. This precaution not only creates more working space but also removes the risk of vehicle damage.
Another safety tip to heed is never to attempt the repair alone. Having a second person can be invaluable, whether it's for passing tools, holding the ladder, or providing immediate assistance in case of an accident. Lastly, don't rush the process. Taking your time can make a significant difference in ensuring a safe repair environment. Remember, your safety is paramount, and no repair is worth compromising it.
Repairing the Garage Door Spring
When your garage door refuses to open or close smoothly, it's likely an issue with the spring mechanism. Addressing this problem promptly can prevent further damage and potential hazards. Let's walk through the essential steps to repair your garage door spring effectively.
Identifying the Broken Spring
Firstly, it's crucial to correctly identify the broken spring. Garage doors typically use either torsion springs, located above the garage door, or extension springs, which run along the sides. Signs of a broken spring include:
- A gap in the spring coil
- The door not opening or closing completely
- A loud bang when the break occurred
Safety Tip: Always wear eye protection and leather gloves during inspection to protect yourself from unexpected spring failure.
Replacing the Broken Spring
After identifying the faulty spring, it's time for replacement. DIY repair of garage door springs can be risky due to the high tension involved, but if you're experienced and confident, these steps will guide you:
- Gather Your Tools: Ensure you have winding bars, locking pliers or C-clamps, a ladder, safety glasses, leather gloves, a wrench, and the correct replacement springs.
- Secure the Door: Use locking pliers or C-clamps to secure the door in place, preventing it from moving while you work.
- Remove the Broken Spring: Loosen the setscrews on the broken spring with caution. If replacing a torsion spring, unwind it carefully using winding bars. For extension springs, ensure the safety cable is intact before unhooking the spring.
- Install the New Spring: Slide the new spring into place, attach it securely, and if it's a torsion spring, wind it according to the manufacturer's guidelines.
Pro Tip: If one spring is broken, it's advisable to replace both, as the unbroken spring will likely fail soon because of equal wear and tear.
Adjusting the Tension of the Spring
Correct tension is essential for the smooth operation of your garage door. After installing the new spring:
- For torsion springs, wind or unwind the spring carefully with winding bars until the door balances and moves freely.
- For extension springs, adjust the tension by hooking the spring onto a different notch on the pulley system.
Remember: Adjusting the tension requires precise movements. If the door feels too heavy or too light, repeat the adjustment process until the balance is just right.
Throughout this repair process, prioritize safety by ensuring the garage door is immobilized and that you're using the correct tools for the job. If at any point you feel unsure or unsafe, it's best to call a professional garage door repair service. These experts can safely and efficiently resolve spring issues, ensuring your garage door operates smoothly once again.
Testing and Maintenance
After successfully repairing or replacing your garage door spring, it's crucial to ensure everything functions as it should. This step not only confirms the repair's effectiveness but also guarantees your safety and that of your property. Let's dive into how you can test your repaired garage door and maintain it to prolong its lifespan.
Testing the Repaired Garage Door
Once the new spring is in place, and all components are securely fastened, it's time to test the door's functionality. Start by lifting the door manually, halfway up. It should stay in place without drifting downward or shooting up. If the garage door fails to remain open or feels unusually heavy, this indicates insufficient spring tension. Conversely, if the door is challenging to pull down from the open position, the springs might be too tight.
Next, engage the automatic opener, if you have one, and observe the door's movement. It should open and close smoothly, without jerking or halting. Listen for any unusual sounds such as grinding or squeaking, which could suggest further adjustments are needed. It's also important to check the balance of the door. You can do this by disconnecting the opener and manually opening the door to about halfway. A well-balanced door will stay in place, signifying proper spring tension.
Performing Regular Garage Door Maintenance
To prevent future breakdowns and ensure the longevity of your garage door springs, regular maintenance is key. Here are some essential steps to keep your garage door in optimal condition:
- Lubricate the Springs: Apply a silicone-based lubricant to the springs at least twice a year. This simple step reduces friction and prevents corrosion, significantly extending the life of the springs.
- Inspect for Wear and Tear: Regularly examine the springs for signs of damage, such as cracks or rust. Early detection of wear and tear can prevent sudden failures and the potential for personal injury or property damage.
- Test Door Balance: Periodically check that your garage door is properly balanced. An unbalanced door can put unnecessary strain on the springs and opener, leading to premature failure.
- Professional Tune-ups: Schedule an annual maintenance check with a professional garage door repair company. They can identify and fix minor issues before they become major problems, saving you time and money in the long run.
Remember, garage door springs have a finite lifespan, typically lasting around 10,000 cycles or 7-10 years depending on usage. If you notice any signs of wear and tear or if the springs have reached their expected lifespan, it's time to replace them. Always consider hiring a professional for spring replacement to ensure safety and quality workmanship.
Calling a Professional
When you're faced with a broken garage door spring, it's essential to weigh your options carefully. Although DIY repairs might seem like a cost-effective solution, the risks involved with garage door spring repair are significant. Garage door springs operate under immense tension, and improper handling can lead to serious injuries, including amputations and, in extreme cases, death. It's not just about having the right tools; understanding the intricacies of how springs work and ensuring safety during the repair process requires professional training and experience.
Garage door springs are designed to last about 10,000 cycles, which translates to 7-10 years of use for an average household. However, when signs of wear and tear become apparent or if the springs have exceeded their lifespan, professional intervention becomes crucial. A professional garage door repair technician can offer a thorough diagnosis, recommend the best course of action, and carry out the repair or replacement safely and efficiently. They have the expertise to handle the springs' tension properly and avoid potential hazards.
Moreover, professionals can assist in ensuring your garage door is balanced correctly after the repair, which is key to the door's smooth operation and longevity. Regular maintenance and tune-ups by a skilled technician can also extend the life of your door and springs, preventing potential breakdowns before they occur.
It's also worth noting that attempting to open a garage door with a broken spring as a temporary fix could exacerbate the problem, making it more costly to repair in the long run. Instead of risking further damage or injury, calling a professional garage door repair company is the safest and most foolproof way to address the issue. They can swiftly diagnose the problem, ensuring that your garage door returns to optimal performance with minimal downtime.
Conclusion
Understanding the intricacies of garage door springs is crucial for the safety and functionality of your garage door. While it might be tempting to tackle repairs on your own, the risks far outweigh the benefits. Remember, dealing with high-tension springs without the proper knowledge and tools can lead to serious injuries. It's not just about fixing a problem; it's about ensuring your garage door operates safely and efficiently for years to come. So when you notice signs of wear or damage, don't hesitate to call in the professionals. They're equipped to handle the job safely, offering peace of mind alongside quality service. Trusting a professional with your garage door spring repair ensures a swift, safe resolution, letting you focus on what matters most without worrying about potential garage door mishaps.
Frequently Asked Questions
Can you replace just one torsion spring on a garage door?
It is often recommended to replace both torsion springs at the same time to ensure balanced operation and avoid uneven wear. Replacing only one can lead to imbalance and potential issues.
Can I manually open my garage door with a broken spring?
Manually opening a garage door with a broken spring can be dangerous due to the door's weight and the lack of support from the spring. It's best to call a professional for safe handling.
What is the average life of a torsion spring?
The average lifespan of a torsion spring on a garage door is typically between 7 and 12 years, depending on usage patterns and maintenance. Frequent use can shorten this lifespan.
How do you open a garage door with a broken tension spring?
Opening a garage door with a broken tension spring is not recommended due to safety risks. It's essential to contact a professional technician who can safely perform the task and recommend necessary repairs.